Adobe After Effects is frequently used to do more advanced chroma key virtual sets composites because of it's toolset is broader than an editors for keying and layering. I'm going to walk you through the steps of making a basic set using Studio 159, a news room from virtualsetworks.
To start, create a project at the resolution you will be working at, in our case we will be doing HD1080. Import the footage of your talent on greenscreen and some footage to display out the main window and something for the screen on the desk. Next we need to import the virtual set.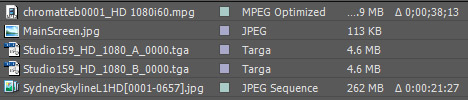
Studio 159 has mattes that are embedded as alpha channels for a desk and a screen, in this case the desk mattes have an A in the name and the screen mattes have a B in the name. When importing these files you may be asked how you want the program to handle the alpha channel. Choose Straight - Unmatted and click okay. Make sure the import as sequence checkbox is not checked (in the lower left of the import panel (if it says sequence not available, select the file you want to import by single clicking on it)).
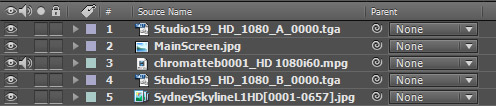 After Effects' timeline works in a top down mentality. The highest track, in this case Desk (Studio159_HD_1080_A_0000.tga), will be shown first, then the video for the desk, then the talent, and so on. If you need to adjust the layer order, select a layer and use CTRL+ALT+UP or DOWN to move the layers into the right order. After Effects' timeline works in a top down mentality. The highest track, in this case Desk (Studio159_HD_1080_A_0000.tga), will be shown first, then the video for the desk, then the talent, and so on. If you need to adjust the layer order, select a layer and use CTRL+ALT+UP or DOWN to move the layers into the right order.
 At this point we only see the desk and desk video over the unkeyed talent. At this point we only see the desk and desk video over the unkeyed talent.
Let's start by getting the video into the desk screen and the talent in shape by keying, masking, and sizing the talent appropriately.
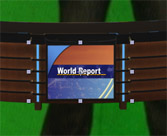 Let's move the desk screen video into the desk's screen. Select the 2nd layer by clicking on it and you will get handles. Use the cursor to move the layer into the screen of the desk and the handles to size it appropriately. Use the space bar and , and . to pan and zoom (or CTRL+ and - for the Photoshop inclined) Let's move the desk screen video into the desk's screen. Select the 2nd layer by clicking on it and you will get handles. Use the cursor to move the layer into the screen of the desk and the handles to size it appropriately. Use the space bar and , and . to pan and zoom (or CTRL+ and - for the Photoshop inclined)
After Effects comes with Keylite 1.2 which is pretty handy. Find it under Effects and Presets>Keying and drag it on to your talent layer and click the triangle to open the options. Don't let all the options faze you, pick your color then adjust the screen gain and balance. Clip Black and White under Screen Matte are also useful for cleanup.
Next we need to crop out some extraneous parts of our "Studio". Create a new Mask by going to Layer>Mask>New Mask (CTRL+Shift+N). Position the 4 yellow box corners to eliminate any non-keyable items. Next, resize and position the layer so your talent sits appropriately behind the desk.
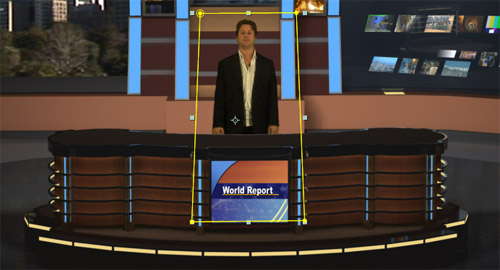
Next, let's move our background video into the window using the handles. Your set should look something like this at this point: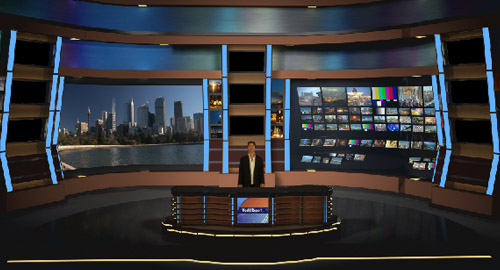
That only leaves the background screens blank which being lazy at this point I will just use a version of the background without alpha channels behind everything which should put stylized versions of the earth in each screen.
Now on to the camera moves. After Effects makes animating everything together pretty easy using the pick whip for selecting parent layers. Essentially, pick one layer (I chose the main background which is Studio159 B) and attach all the other layers to it via the pick whip (Spiral in the parent column). Alternately you can select the parent from the pulldown.

Now, anything you do to the parent layer will be followed by all the child layers you just attached to it. Let's do a nice zoom into our talent for our opener.
Open the transform tools on your parent layer (in our case the main layer highlighted above). Make sure to place you position bar at zero on the timeline and turn on the animation feature of the Position and Scale by clicking the stopwatches. Next move the position bar to the end of your video clip and scale the layer up 200% and position the layer so that the talent is well framed with a decent amount of headroom.
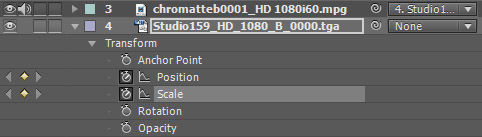
Lastly you can adjust the motion of the layer by opening the Graph Editor and applying Ease in and Out and additional keyframes to tweak your virtual camera's motion.

You should now have a multilayer virtual set with camera motion. Preview your movie or render your masterpiece out.
|